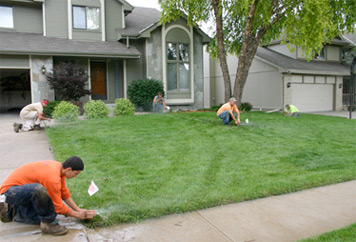
Little Known Facts About Irrigation Installation.
I also had to rent their truck to get it home, since it wouldn’t fit in my car. So I used that as a chance to also buy loads and loads of PVC pipe (both 1″ and 3/4″ widths). The trencher was VERY heavy and it took me and two other guys to get it in and out of the truck.

You basically pull it backward steadily and the “blade,†which you can set to plunge into the earth at various depths, churns the dirt up, and leaves a narrow trench. The trencher is a bit tedious/slow to use and it still proved to be pretty exhausting, between yanking its weight and the vibration of you felt through your bones the whole time.
Can I blame all my shovel digging earlier in the day for not being up to the task? While he did that, I wasn’t off the hook though. I shoveled the trench alongside our front walkway (as not to damage it with the machine) and I worked on running a pipe under the sidewalk itself (for the “mulch bed zoneâ€).
Lawn Watering System Fundamentals Explained
Digging – including renting & returning the trencher – ended up consuming most of the first day, which was a surprise to all of us. My neighbor thinks last time he did this he rented a smaller cable installer which digs a 4″ deep trench. I can’t speak to whether that would’ve worked or not, but it might be worth asking at your tool rental place – since it does appear to be easier and faster to maneuver.
This is a straightforward process, but – depending on the size of your system – can be tedious and time-consuming. I started by loosely laying out my PVC along my trenches (irrigation installation). I used 1″ for my main water line and for the first 2 or 3 sprinkler heads on each zone line, at which point I reduced it 3/4″.
To connect all of the pipes together, you use various couplings and elbows that get cemented in place. The process looks a little something like this. Start with this primer, like this purple guy. Using the built-in brush, coat the ends of the PVC pieces you’ll be connecting, making sure to go all the way around – it’s very thin, so try not to drip on anything like sidewalks or driveways.
Things about Irrigation Installation
The primer dries within a couple of seconds, at which point you can apply your cement. We used this blue kind. Same deal: use the brush to coat all sides with it. It’s pretty gooey, but again try not to drip it on anything you don’t want a blue stain on.
Then you push the pieces together, giving it a slight twist and holding for about 30 seconds. I usually do this with two hands to apply pressure from both sides, but one hand was occupied with a camera phone for this pic. If ever I needed to cut a piece of PVC, I used this ratcheting pipe cutter.
I know this doesn’t seem like a difficult task, and it’s not. But I had LOTS of connections to create and working hunched over (dare I say “in the trenches�) and repeatedly pushing pipes together with some force slowly took a toll on my back and shoulders. I had some of the worst sleeps of my life during this project because I had tweaked my shoulder in a way that didn’t allow me to lay on it.
The smart Trick of Sprinkler Installation Cost That Nobody is Talking About
To install into your piping, the valves I used took some threaded couplings that I tightly secured with some plumbers tape and a couple of tightening twists of my wrench. I don’t have any picture of the installation, but I used the same cementing process to attach the couplings to the rest of my pipe, right where each of my zone water lines branched off the main line.
Mine had to be added during the pipe install, but some can lay over your pipe afterward. The valves need to be wired to your controller, so I’ll show you this part now, but I actually did my wiring after all of my piping was completed. Again, I’m using a 10-conductor underground wire that, when cut open, has 10 strands of different colors.
I made black the common wire and then just went in “rainbow order†to help me keep my zones straight. The gray and brown wires could be used later if I wanted to add two more zones. And long story short, the zone 2 wire (red) jammed as I tried to put it in, so it didn’t connect fully….
The Best Guide To Residential Sprinkler System
Rather than buy a replacement controller, I just bypassed Zone #2. That means I’m using Zone #1, then Zones #3-7 to control my six zones. One of the many small annoyances of this project, but at the end of the day, no biggie. With my controller wired (but still not plugged in) I then threaded the wire across the yard, through my main line trench, all the way to my first valve.
At each valve, I had to connect one of the vavle’s red wires to the black (common) wire and the other to the color that would control that zone (this would be my Zone #5, so I used green to correspond with the wiring at the controller) (best sprinkler system). This would literally be the end of the line for the green wire, since it’s not needed on the valves further down the line.
Same goes for the black common wire, which is why you see two black strands going into the wirecap pictured above. best sprinkler system. In retrospect, I probably could’ve figured out a way to not cut all of the colors at each valve and just extract the colors needed – which would’ve saved lots of time.
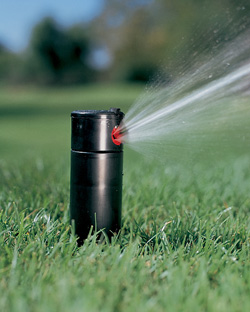
rain bird sprinkler installation sprinkler system service new irrigation system